AWS Neptune Example using Tinkerpop
Published
Updated
Amazon’s Neptune service (formerly known as Blazegraph) is a fault-tolerant, highly performant, graph database which is intended for large scale applications which require graph storage in the cloud. It has native integration with Apache TinkerPop, Gremlin, and SPARQL so that you can easily interact with the database without needing any extra AWS libraries or utilities.
Graph Models in Neptune
There are two popular ‘models’ in the graph ecosystem:
- Property Graph - This is also known as a labeled property graph or an ‘LPG’. These graphs utilizes edges and vertices (plural for vertex). Each of these vertices (also known as a nodes) has a uniquely identifying key associated it which is comparable to a primary key within a relational database. What is special about this graph model is that you can store properties on both the vertex as well as the various edges between. Additionally, these edges can be traversable in one or both directions (bidirectional).
- RDF - This is also known as a triple store and it does not have an internal structure. Each resource (node / vertex) has a relationship (an edge) which is usually defined as a URI or unique identifier.
AWS Neptune has support for both property graphs as well as RDF model graphs.
Tinkerpop Configuration Example for Neptune
The following code will show you how to configure Tinkerpop so that it can connect to a Neptune instance on AWS.
package com.codetinkering.tinkerpop;

import org.apache.tinkerpop.gremlin.driver.Cluster;
import org.apache.tinkerpop.gremlin.driver.remote.DriverRemoteConnection;
import org.apache.tinkerpop.gremlin.process.traversal.dsl.graph.GraphTraversalSource;
import org.apache.tinkerpop.gremlin.structure.util.empty.EmptyGraph;
import org.springframework.boot.CommandLineRunner;
import org.springframework.boot.autoconfigure.SpringBootApplication;
import org.springframework.context.annotation.Bean;
import org.springframework.context.annotation.Configuration;

import static org.apache.tinkerpop.gremlin.process.traversal.AnonymousTraversalSource.traversal;

@Configuration
public class NeptuneConfigExample {

    @Bean
    public Cluster cluster() {
        return Cluster.build()
                .addContactPoint("your-neptune-instance-here.xxxxxxxxxxxx.us-east-1.neptune.amazonaws.com")
                .port(8182)
                .enableSsl(true)
                .keyCertChainFile("./cert/SFSRootCAG2.pem")
                // download it from https://www.amazontrust.com/repository/SFSRootCAG2.pem
                // and place it at /tinkerpop-neptune-example/cert/SFSRootCAG2.pem
                .maxConnectionPoolSize(5)
                .maxInProcessPerConnection(1)
                .maxSimultaneousUsagePerConnection(1)
                .create();
    }

    @Bean
    public GraphTraversalSource g(Cluster cluster) {
        return traversal().withRemote(DriverRemoteConnection.using(cluster));
    }


}
Creating a Neptune Database using the AWS Console
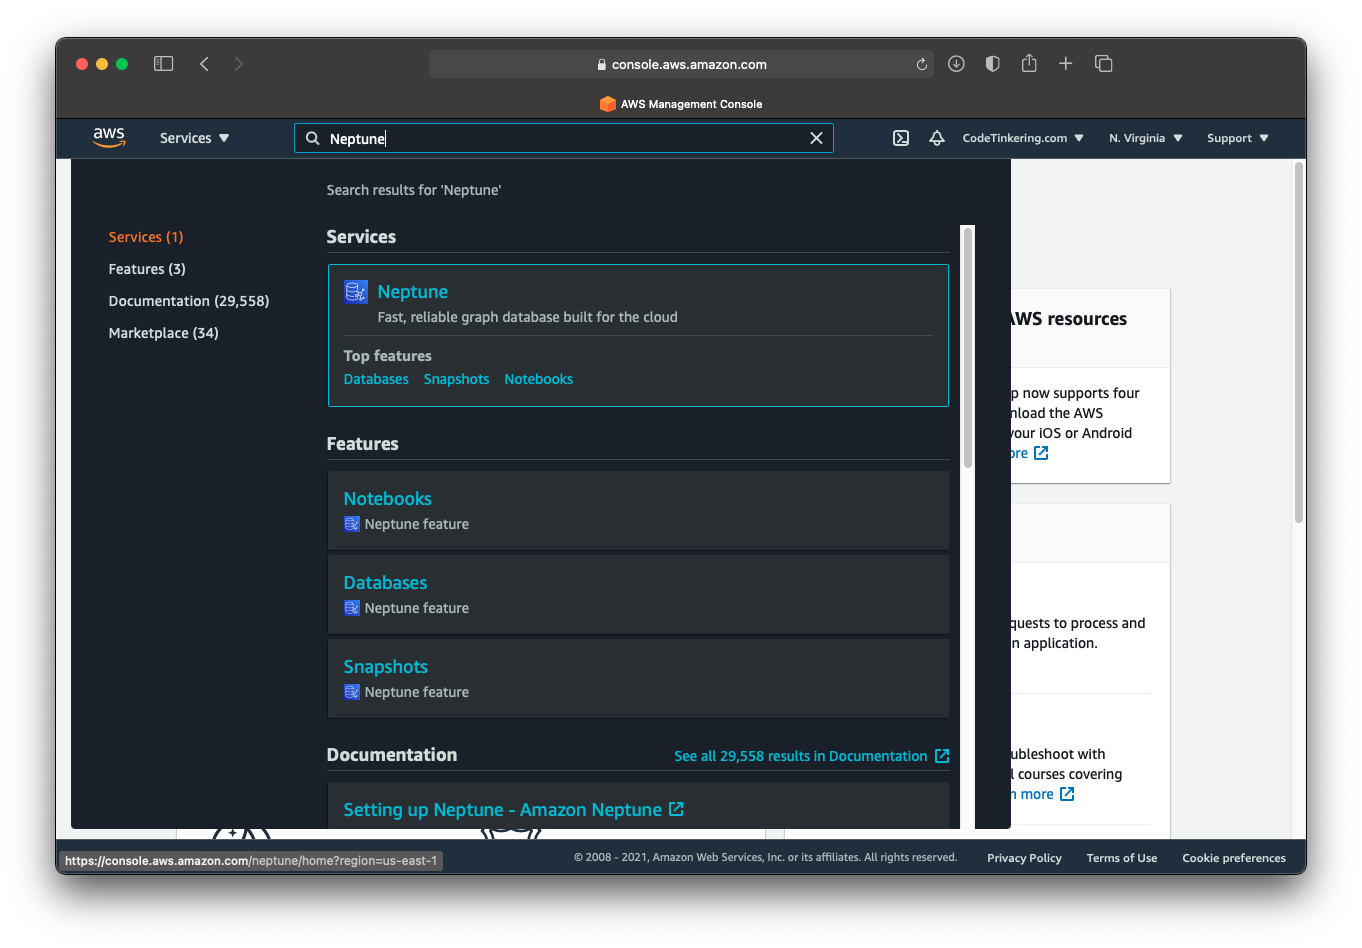
The following steps will outline how to easily create a Neptune instance within your AWS console. First, log in to your AWS Console and select Neptune from the available services.
Select the option to create a new database and follow the steps below:
Engine Options
This section within the AWS Console lets you choose the version of the Neptune software that will run within your instance.
Settings
This section lets you specify a name or alias for your graph database cluster. It needs to be unique across all of the DB clusters within your AWS account.

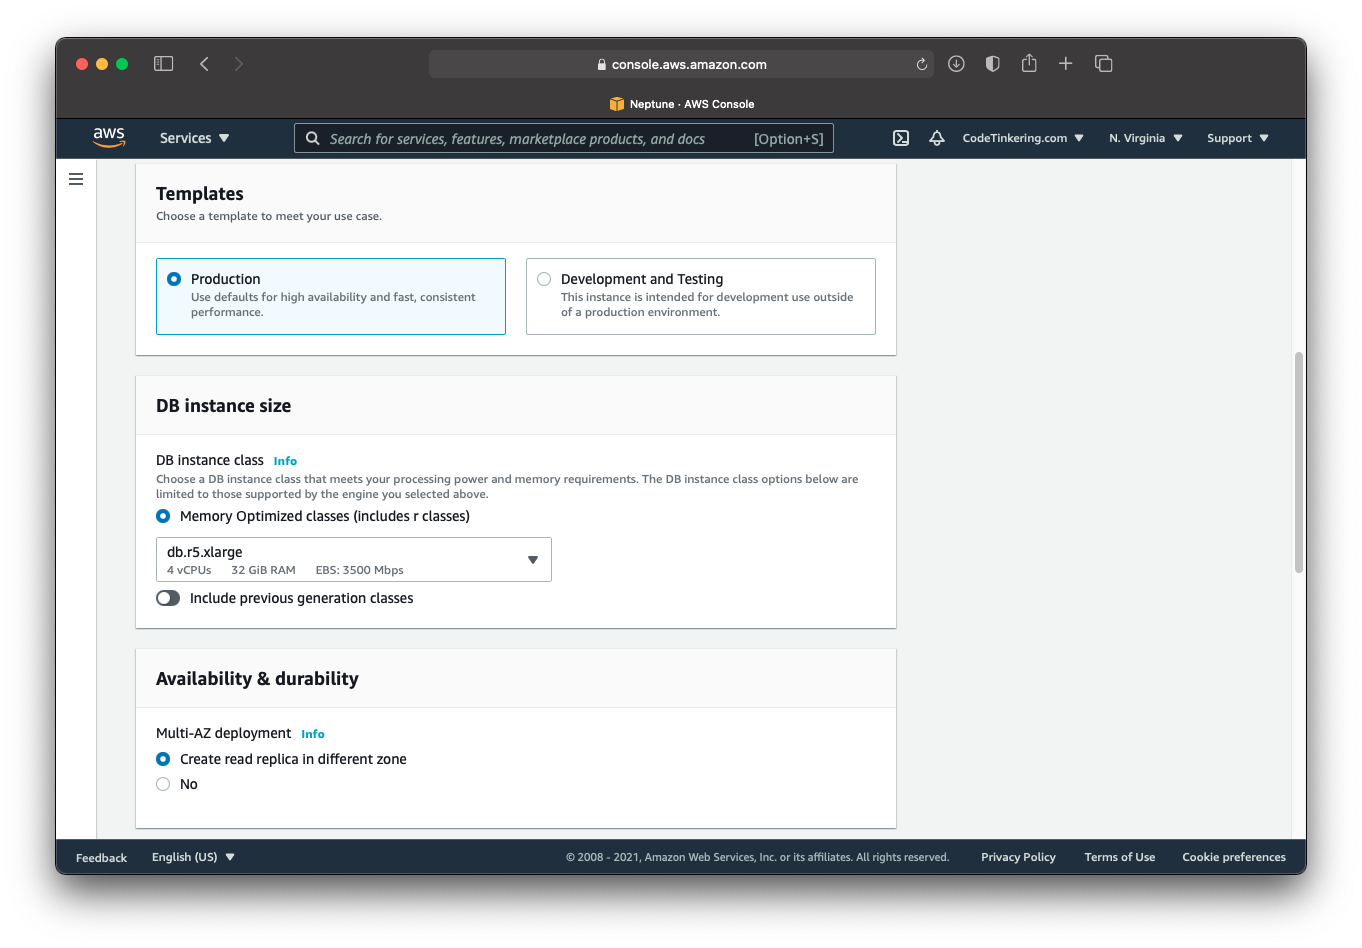
Templates
You can choose if your Neptune Database is a production instance or a development and testing one. If Development and Testing is selected, you will only see one option available to you in the following DB instance size section which limits the Neptune instance to 4GB of RAM and 2 CPUs.
Neptune DB Instance Size
You have a variety of options to choose from and also have the ability to use previous generation hardware should you click the radio button include previous generation classes. From here you have a variety of options presented to you, with varying numbers of CPU’s (processors), Memory amounts (RAM), and EBS speed (the speed for Elastic Block Storage).
The standard options as of May 2021 are as follows:
- db.r5.large 2 vCPUs, 16GiB RAM, 3.5Gbps EBS
- db.r5.xlarge 4 vCPUs, 32GiB RAM, 3.5Gbps EBS
- db.r5.2xlarge 8 vCPUs, 64GiB RAM, 3.5Gbps EBS
- db.r5.4xlarge 16 vCPUs, 128GiB RAM, 3.5Gbps EBS
- db.r5.8xlarge 32 vCPUs, 256GiB RAM, 8Gbps EBS
- db.r5.12xlarge 48 vCPUs, 384GiB RAM, 7Gbps EBS
- db.r5.16xlarge 64 vCPUs, 512GiB RAM, 10Gbps EBS
- db.r5.24xlarge 96 vCPUs, 768GiB RAM, 14Gbps EBS
Availability and Durability
This section lets you automatically create a read replica of Neptune in a different availability zone. This is good for preventing data loss and high availability should one zone go down in AWS.
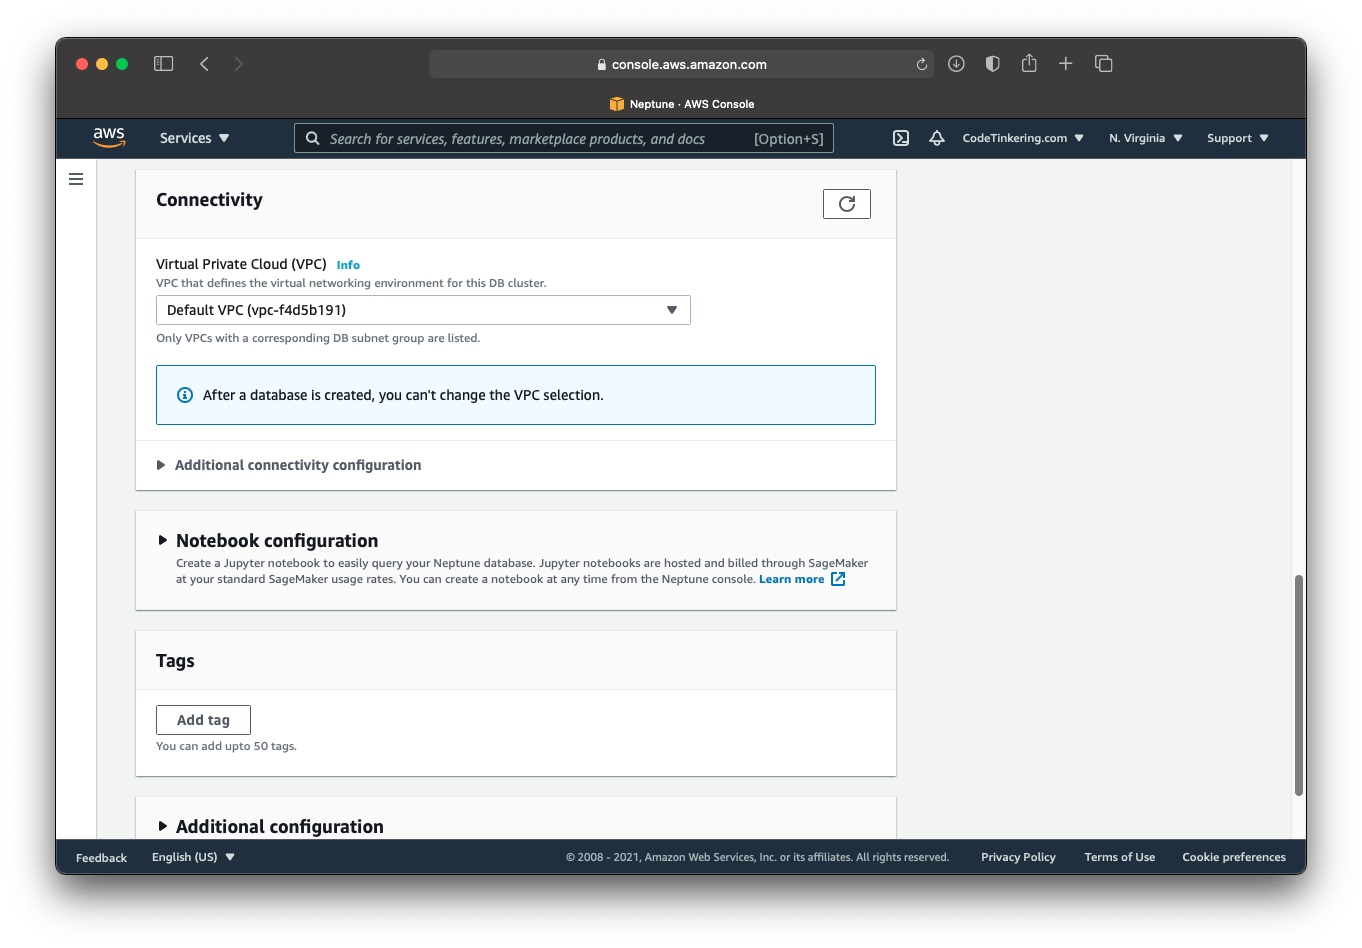
Connectivity
The VPC option lets you decide which Virtual Private Cloud your Neptune instance will be networked. There are some other options here for subnet groups and such. Be aware these options cannot be changed once Neptune is created.
Notebook Configuration
This section lets you easily create a Jupyter notebook for interacting with the data stored in your Neptune database. This is helpful if you are new to Neptune and want an easy way to visualize or quickly see the data.
Connecting to Neptune
Once the previous steps have been completed, click the create database button.
On the AWS navigation bar (lefthand side) click Databases to see a list of all the Neptune database instances. Click the Neptune writer instance of the database you created and you will see the Connectivity & security pane has a number of details like endpoint & port.
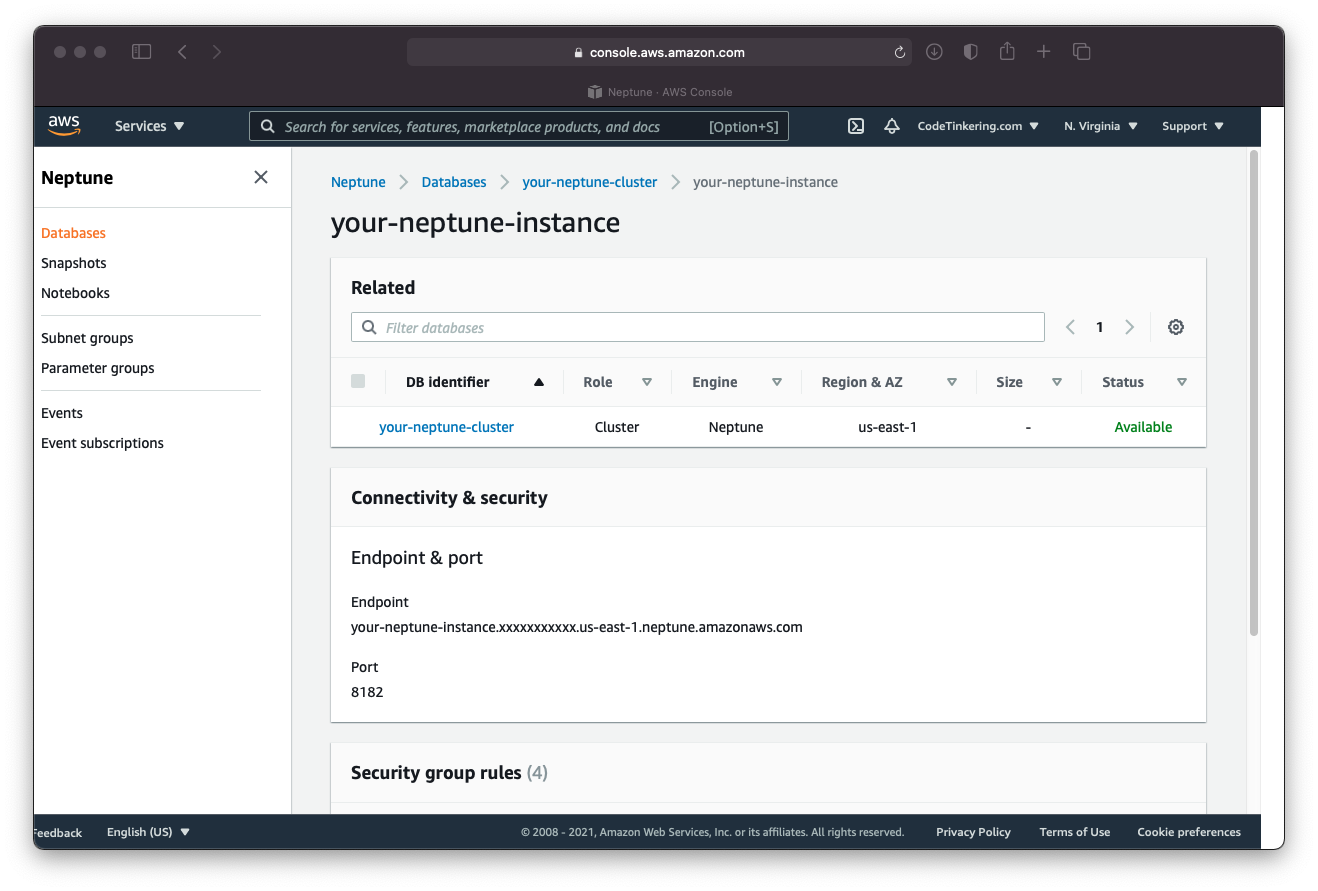
Copy these values, you will need them to connect to your Neptune instance. Place the endpoint value into the addContactPoint method within the Tinkerpop cluster builder. If you used a port number different than 8182 for Neptune, configure that too.
When configuring the keyCertChainFile parameter within Tinkerpop, you will only need this file if the AWS SFSRootCAG2.pem file is not already stored within your JVM’s trust store. If you know you have it, you can remove this line.
.keyCertChainFile("./cert/SFSRootCAG2.pem")
Otherwise, download it from here and place it into a folder called cert within the root folder of your project.
Take time to adjust the rest of Tinkerpop’s pooling settings such as the maxConnectionPoolSize and maxSimultaneousUsagePerConnection to better fit your application. These will configure Gremlin’s connection pool allowing your application to perform better with scale.
Neptune Authentication and Authorization
Neptune does not have a conventional authentication mechanism with a username / password as one would initially expect. Instead, it relies on security groups or IAM roles to restrict access to the instance.
Configuring Neptune Security Groups
You will need to make sure your application’s security group has an outbound TCP rule permitting connections to your Neptune Instance.

Likewise, your Neptune’s security group will require an inbound TPC rule permitting inbound connections from your application.

Putting it all together
The following Java code will create a Spring Boot Application for your Application and will perform all the necessary autowiring for the Tinkerpop Cluster and GraphTraversalSources.
package com.codetinkering.tinkerpop;

import org.apache.tinkerpop.gremlin.driver.Cluster;
import org.apache.tinkerpop.gremlin.process.traversal.dsl.graph.GraphTraversalSource;
import org.apache.tinkerpop.gremlin.structure.T;
import org.apache.tinkerpop.gremlin.structure.Vertex;
import org.springframework.beans.factory.annotation.Autowired;
import org.springframework.boot.CommandLineRunner;
import org.springframework.boot.SpringApplication;
import org.springframework.boot.autoconfigure.SpringBootApplication;

import static org.apache.tinkerpop.gremlin.process.traversal.dsl.graph.__.*;

@SpringBootApplication
public class NeptuneAppExample implements CommandLineRunner {

    @Autowired
    Cluster cluster;

    @Autowired
    GraphTraversalSource g;

    @Override
    public void run(String... args) throws Exception {

        g.addV("MyVertexLabel")
                // You can also specify a custom unique ID like so:
                // .property(T.id, 123)
                .property("name", "test")
                .property("country", "example")
                .property("employees", 12345)
                .next();

        writeGraphOut();
    }


    void writeGraphOut() {
        g.io("graph-file-dump.json").write().iterate();
    }

    void readGraphIn() {
        g.io("graph-file-dump.json").read().iterate();
    }

    public static void main(String[] args) {
        SpringApplication.run(NeptuneAppExample.class, args);
    }
}
writeGraphOut and readGraphIn are helper methods that can let Tinkerpop serialize your graph into a JSON object on the file system. This allows you to dump the data should you want to load it to another Neptune instance or perhaps migrate your data from one graph database to another.
Common Tinkerpop errors when using Neptune
java.lang.RuntimeException: Could not initialize client for Host
Caused by: org.apache.tinkerpop.gremlin.driver.exception.ConnectionException: Could not open Connection
Caused by: io.netty.channel.ConnectTimeoutException: connection timed out us-east-1.neptune.amazonaws.com:8182
This happens when your application’s security group does not have the correct network firewall configuration to access your Neptune instance. You need to have an outbound rule applied to your application’s security group and a permissive inbound rule to your Neptune database’s security group. See the above section on configuring your security groups.
Checkout this project from Github
git clone https://github.com/code-tinkering/tinkerpop-neptune-exampleDownload Zip