Spring Security 5 OAuth2 OIDC Example
Published
Updated
This article will guide you on how to integrate OAuth2’s OpenID Connect (OIDC) federated authentication using Spring Security 5 into your Spring Boot application using the spring-boot-starter-oauth2-client starter. Additionally, we will cover how to use OpenID Connect (OIDC) to authenticate using JWT’s with an identity provider like Auth0 or PingFederate.
Introduction to OAuth and OIDC
What is OAuth?
OAuth is an open source framework for delegating and federating authentication across multiple systems and platforms. It is loosely defined for purposes of flexibility and is composed of a number of different extensions. It is best to think of OAuth as a toolbox containing a number of different authentication tools which may be used in conjunction with one another.
OAuth extensions
These are many of the components or extensions that make up the OAuth framework:
- OIDC - strictly defined and rigidly structured with JWT’s.
- JWT JSON Web Token (RFC 7519) - Sometimes pronounced JOT read more about JWTs below
- JWE JSON Web Encryption - An encrypted JSON token, also known as an opaque token and can securely store data.
- Token Revocation (RFC 7009) - allows a token to be cancelled or revoked via an API. (Optional but treat it as required)
- Token Introspection (RFC 7662) - Examines a token to describe its contents. Useful for Opaque Tokens and determines if a token is active or if the token has been revoked.
- Dynamic Client Registration (RFC 7591) - Allows for systems to register themselves with the authorization server for requesting tokens. Used in self-service API portals for developer registration. Used in conjunction with RFC 7592 - dynamic client management
- Authorization Server Metadata (RFC 8414) - acts as an OAuth discovery document which allows the authorization server to be queried for capabilities and endpoints, thereby allowing one to configure their application appropriately.
What is the difference between OAuth 1.0 and OAuth2?
Currently, there are two versions of OAuth: OAuth 1.0 and OAuth2. They are completely different mechanisms as OAuth2 is a complete re-invention and rewrite of the old proprietary authentication model previously based on Google’s AuthSub and Flickr’s auth API which comprised OAuth 1.0. Now days, when anyone refers to OAuth, they likely are referring to OAuth2 as OAuth 1.0 is now obsolete and end of life as of April 2012. Don’t be confused if I use the word OAuth in lieu of OAuth2 - this article is specific to OAuth2.
What is OIDC?
OIDC stands for OpenID Connect, it is a strictly defined feature built into OAuth2 which provides profile information about the user that is authenticated, such as email, username, etc. OIDC allows a user to authenticate to an Authorization Server also known as an Identity Provider and be provided an Access Token and a JWT ID Token.
What is a JWT?
A JWT or JSON Web Token is base64 encoded JSON String (not encrypted) comprised of a header,a payload, and a signature.
- Header - Defines the token type and declares the signing algorithm used in the token.
- Payload - Contains claims which are used to assert statements about the user such as the email, username, privileges, etc. There are more complexities to the payload claims, such as registered vs public vs private claims but you won’t need to know about these for this exercise.
- Signature - Used to validate the payload issued by the authorization server to prevent tampering. It can also be used to perform validation of the authorization server.
The following is an example of a JWT, note the separation of the three components with a . character:
eyJhbGciOiJIUzI1NiIsInR5cCI6IkpXVCJ9.eyJzdWIiOiIxMjM0NTY3ODkwIiwibmFtZSI6IlRlc3QgVXNlciIsImlhdCI6MTUxNjIzOTAyMX0.uKul7G9TzvwBBgHLruHWIYQJyyN5xWEVTPEdh4sH0Zo

---

Header:
eyJhbGciOiJIUzI1NiIsInR5cCI6IkpXVCJ9

{
  "alg": "HS256",
  "typ": "JWT"
}

---

Payload:
eyJzdWIiOiIxMjM0NTY3ODkwIiwibmFtZSI6IlRlc3QgVXNlciIsImlhdCI6MTUxNjIzOTAyMX0

{
  "sub": "1234567890",
  "name": "Test User",
  "iat": 1516239021
}

---

Signature:
uKul7G9TzvwBBgHLruHWIYQJyyN5xWEVTPEdh4sH0Zo

HMACSHA256(
  base64UrlEncode(header) + "." +
  base64UrlEncode(payload),
  secret
)
What this tutorial is not:
- Not a way to secure an API endpoint intended for browser-less access. OIDC isn’t the best tool for such a task. Instead, you should use the Spring Resource Server library.
OpenID Connect with Spring Security
Start by adding the provided imports to your project’s pom.xml file:
<?xml version="1.0" encoding="UTF-8"?>
<project xmlns="http://maven.apache.org/POM/4.0.0"
         xmlns:xsi="http://www.w3.org/2001/XMLSchema-instance"
         xsi:schemaLocation="http://maven.apache.org/POM/4.0.0 http://maven.apache.org/xsd/maven-4.0.0.xsd">
    <modelVersion>4.0.0</modelVersion>

    <groupId>com.codetinkering</groupId>
    <artifactId>spring-boot-oauth2-oidc-example</artifactId>
    <version>1.0-SNAPSHOT</version>
    <name>oauth2-example</name>

    <parent>
        <groupId>org.springframework.boot</groupId>
        <artifactId>spring-boot-starter-parent</artifactId>
        <version>2.4.1</version>
    </parent>

    <properties>
        <java.version>15</java.version>
    </properties>

    <dependencies>
        <dependency>
            <groupId>org.springframework.boot</groupId>
            <artifactId>spring-boot-starter-oauth2-client</artifactId>
        </dependency>
        <dependency>
            <groupId>org.springframework.boot</groupId>
            <artifactId>spring-boot-starter-security</artifactId>
        </dependency>
        <dependency>
            <groupId>org.springframework.boot</groupId>
            <artifactId>spring-boot-starter-web</artifactId>
        </dependency>
    </dependencies>

    <build>
        <plugins>
            <plugin>
                <groupId>org.springframework.boot</groupId>
                <artifactId>spring-boot-maven-plugin</artifactId>
            </plugin>
        </plugins>
    </build>
</project>
In your Spring Security configuration class, extend the WebSecurityConfigurerAdapter and override the configure method with the following configuration:
package example;

import org.springframework.security.config.annotation.web.builders.HttpSecurity;
import org.springframework.security.config.annotation.web.configuration.EnableWebSecurity;
import org.springframework.security.config.annotation.web.configuration.WebSecurityConfigurerAdapter;

@EnableWebSecurity
public class SecurityConfig extends WebSecurityConfigurerAdapter {
    @Override
    protected void configure(HttpSecurity http) throws Exception {
        http
                // only disable these during testing or for non-browser clients
                .cors().disable()
                .csrf().disable()
                .authorizeRequests()
                .anyRequest().authenticated()
                .and()
                .oauth2Login().loginPage("/oauth2/authorization/auth0");
    }
}
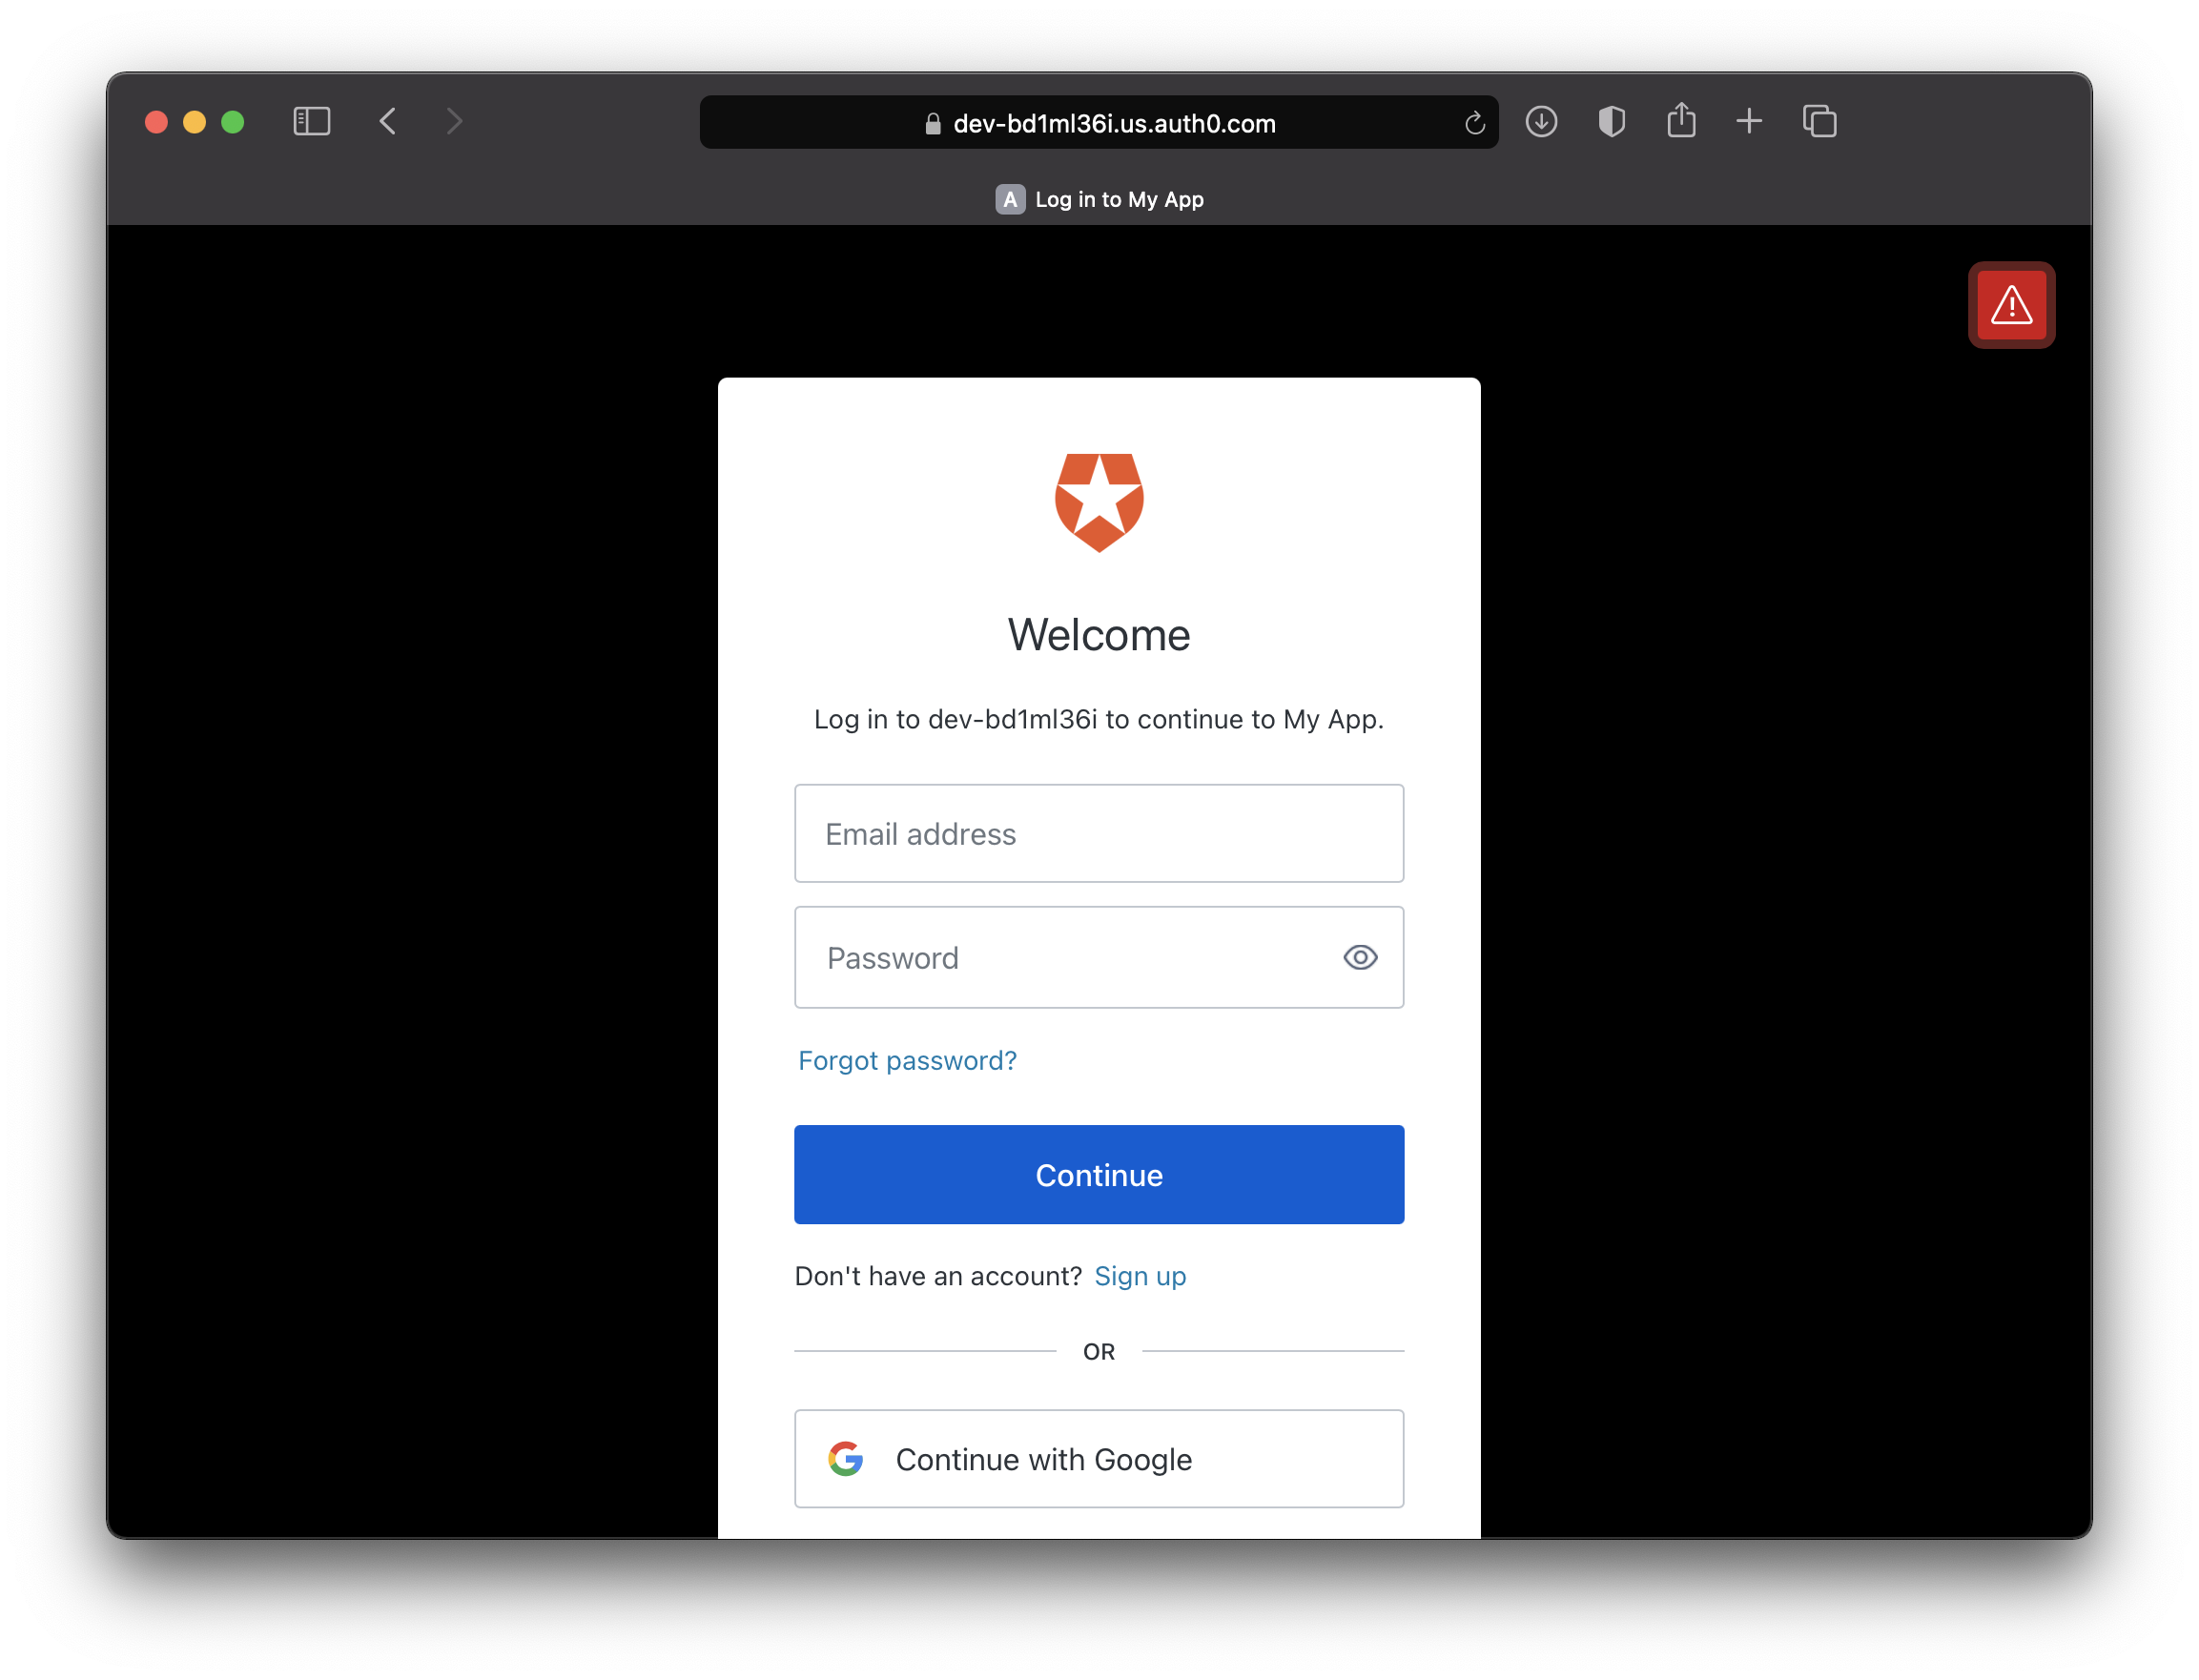
The above code restricts access to all of your application’s URLs and secures them with Spring’s oauth2Login provider. In order to access any of the pages, the user will first be redirected to the OpenID Connect Provider. In this example, I am using the OAuth sandbox provided by Auth0.
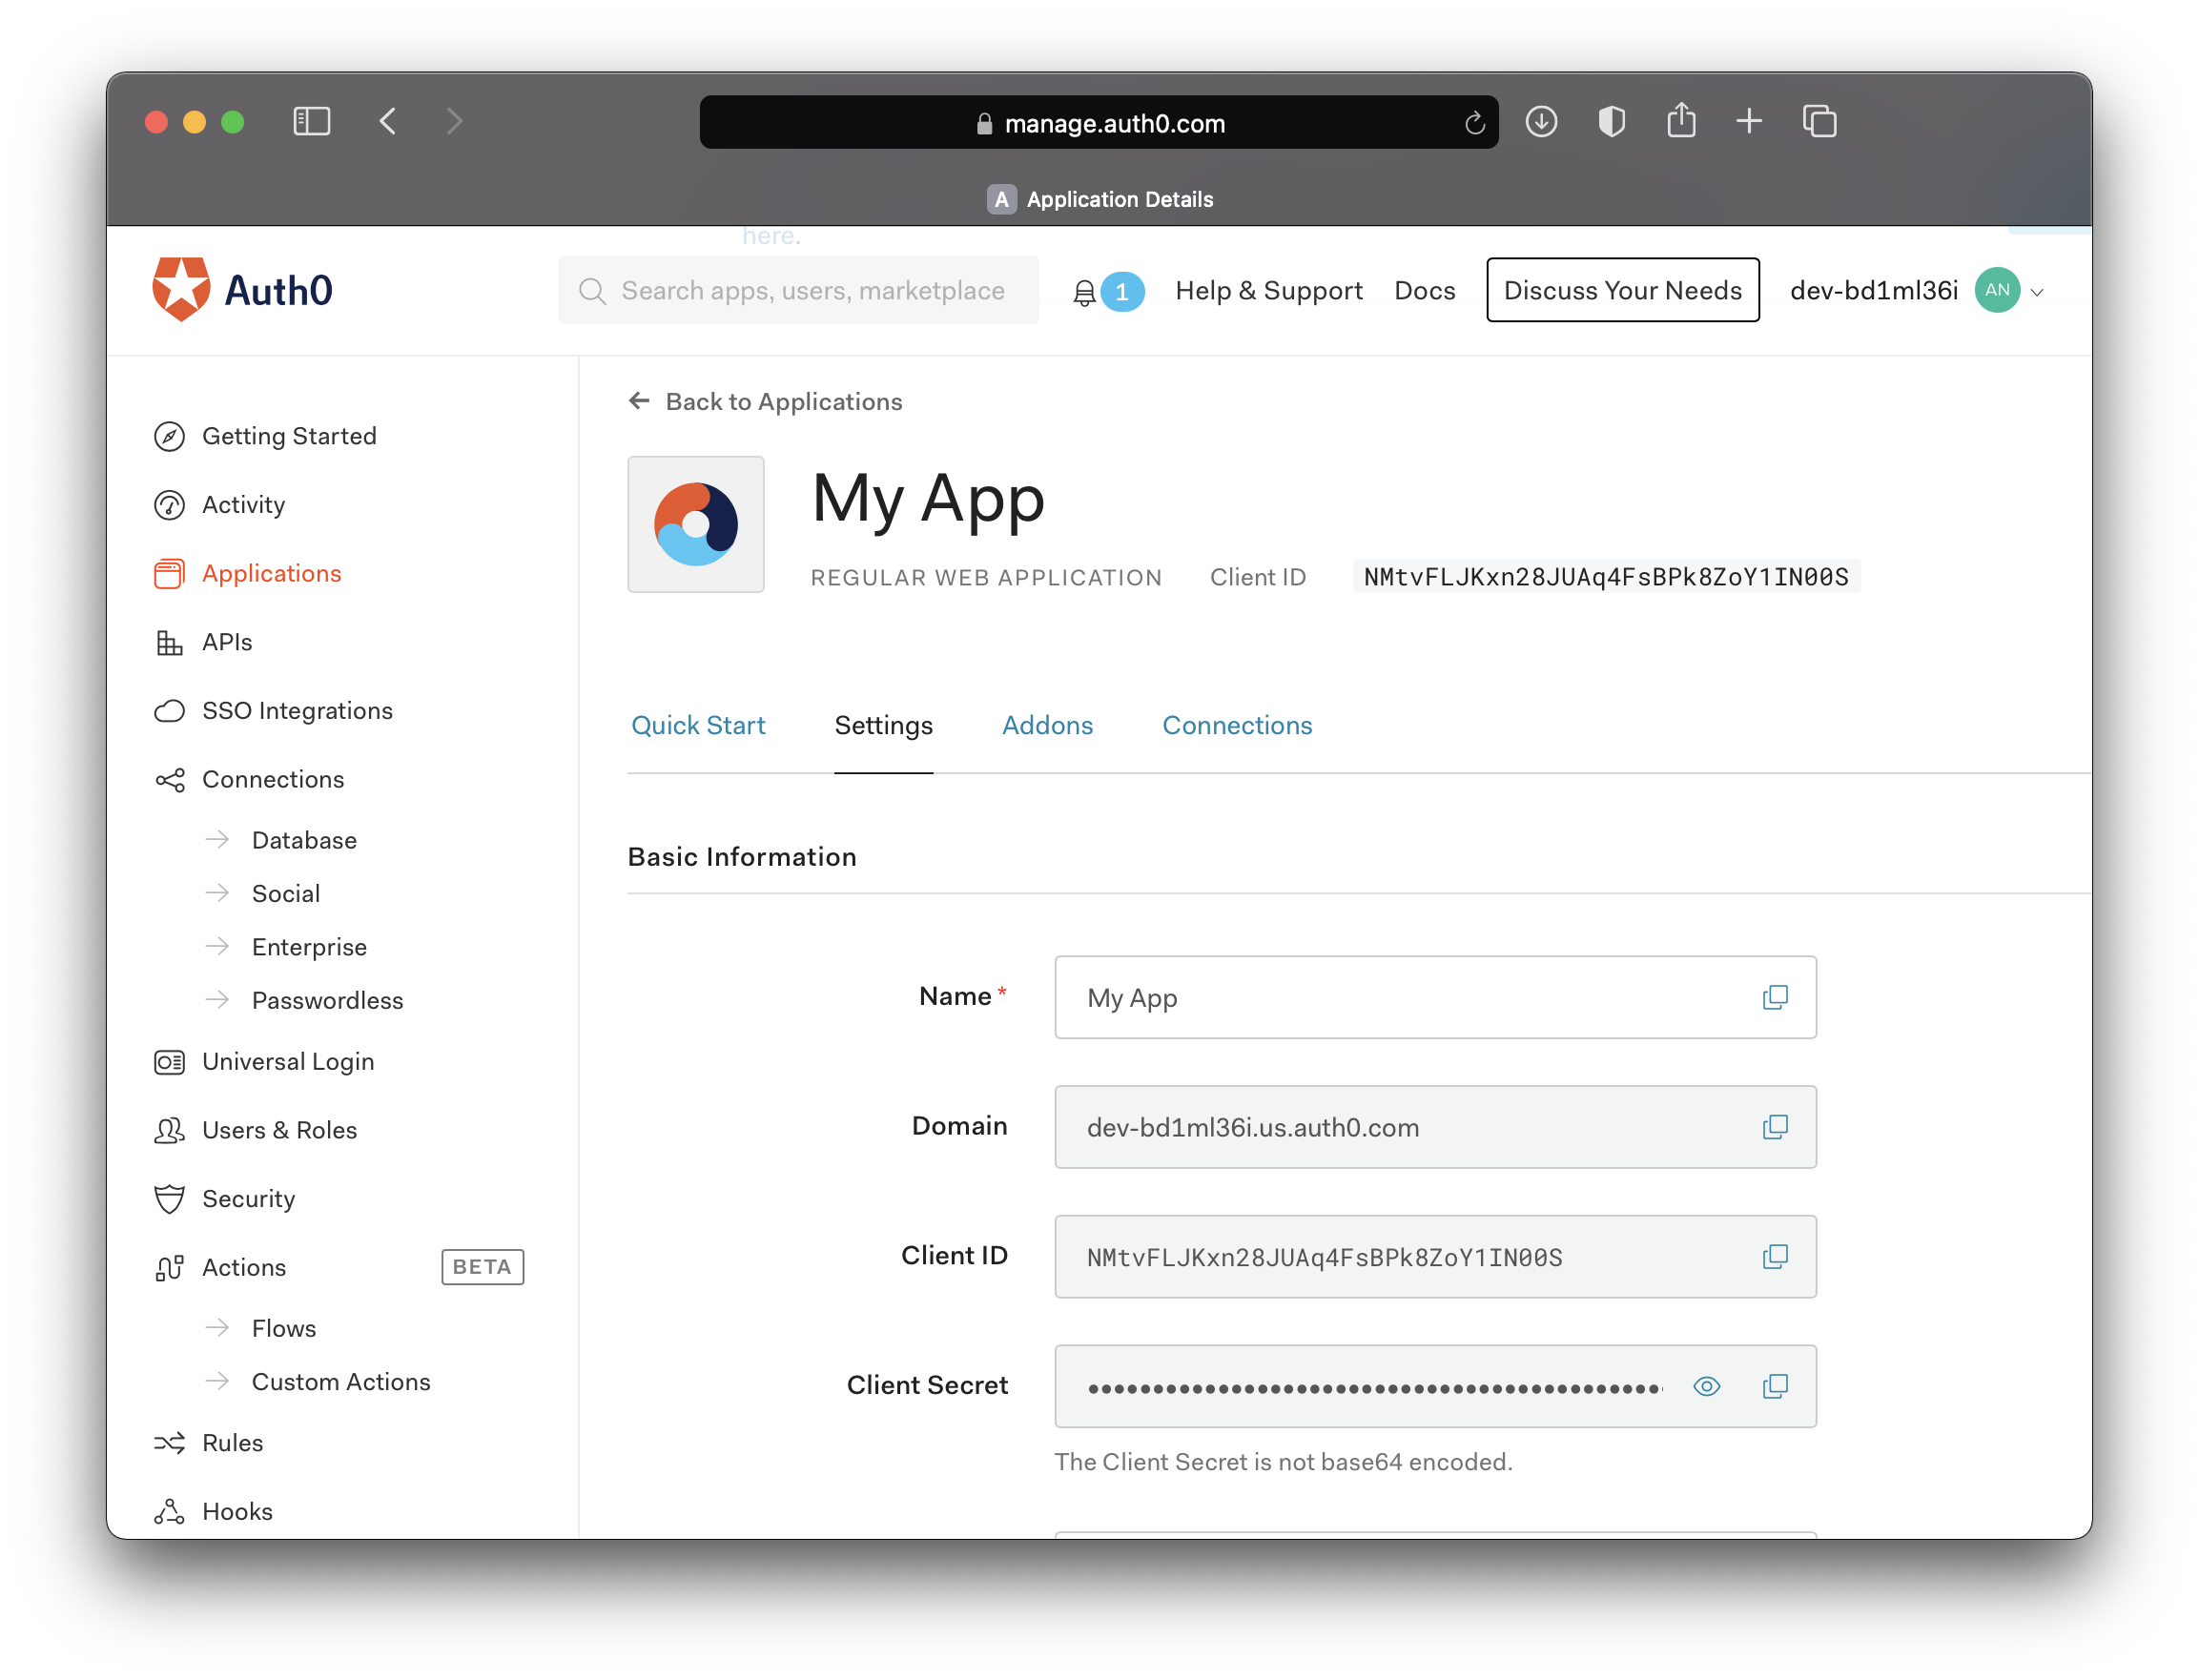
In order to perform the OIDC authorization, you will need a client-id, a client-secret, and an issuer-uri. These values should be available to you via your identity provider. In Auth0, this is available in the applications sections of the dashboard. In Ping Federate, you will need to log into Ping Central and create a new OAuth application and view the configuration to retrieve these attributes.
Now pass these values into their respective locations in your application.yml configuration or your properties file if you prefer.
spring:
  security:
    oauth2:
      client:
        registration:
          auth0:
            client-id: NMtvFLJKxn28JUAq4FsBPk8ZoY1IN00S
            client-secret: xxxxxxxxxxxxxxxxxxxxxxxxxxxxxxxxxxxxxxxxxxxxxxxxxxxxxxxxxxxxxxxx
            scope:
              - openid
              - profile
              - email
        provider:
          auth0:
            issuer-uri: https://dev-12345.us.auth0.com/
Clean, compile and run your project with Maven using the following:
mvn clean compile package
mvn spring-boot:run
Try to access your application at http://localhost:8080/ and you will be redirected to your authorization provider:
Checkout this project from Github
git clone https://github.com/code-tinkering/spring-boot-oauth2-oidc-exampleDownload Zip