spring-security-saml2-service-provider example
Published
Updated
This is a guide on how to create a simple service provider with Spring Security 5’s new Saml2 service provider library.
If you are looking to create an identity provider, or for a more comprehensive resource on SAML and its integration, please see this guide instead.
When creating your project, please reference the following project structure. You can create your project via Spring Initializr or simply create a blank Maven project using a Spring Boot parent starter.
Sample Project Structure:

Include the following dependencies in your project pom file:
<?xml version="1.0" encoding="UTF-8"?>
<project xmlns="http://maven.apache.org/POM/4.0.0"
         xmlns:xsi="http://www.w3.org/2001/XMLSchema-instance"
         xsi:schemaLocation="http://maven.apache.org/POM/4.0.0 http://maven.apache.org/xsd/maven-4.0.0.xsd">
    <modelVersion>4.0.0</modelVersion>

    <groupId>com.codetinkering</groupId>
    <artifactId>spring-security-saml2-service-provider-example</artifactId>
    <version>1.0-SNAPSHOT</version>

    <parent>
        <groupId>org.springframework.boot</groupId>
        <artifactId>spring-boot-starter-parent</artifactId>
        <version>2.4.1</version>
    </parent>

    <properties>
        <java.version>1.8</java.version>
    </properties>

    <dependencies>

        <dependency>
            <groupId>org.springframework.security</groupId>
            <artifactId>spring-security-saml2-service-provider</artifactId>
        </dependency>

        <dependency>
            <groupId>org.springframework.security</groupId>
            <artifactId>spring-security-config</artifactId>
        </dependency>

        <dependency>
            <groupId>org.thymeleaf.extras</groupId>
            <artifactId>thymeleaf-extras-springsecurity5</artifactId>
        </dependency>

        <dependency>
            <groupId>org.springframework.boot</groupId>
            <artifactId>spring-boot-starter-thymeleaf</artifactId>
        </dependency>

        <dependency>
            <groupId>org.springframework.boot</groupId>
            <artifactId>spring-boot-starter-web</artifactId>
        </dependency>

    </dependencies>

</project>
You will need two classes, an application controller, and a main class to initialize Spring boot:
package example;

import org.springframework.stereotype.Controller;
import org.springframework.web.bind.annotation.GetMapping;

@Controller
public class AppController {

    @GetMapping("/")
    public String index() {
        return "index";
    }
}
package example;

import org.springframework.boot.SpringApplication;
import org.springframework.boot.autoconfigure.SpringBootApplication;

@SpringBootApplication
public class Saml2ExampleServiceProviderApp {

    public static void main(String[] args) {
        SpringApplication.run(Saml2ExampleServiceProviderApp.class, args);
    }
}
Enabling Spring Security’s Metadata Endpoint Provider
Finally, since the Spring SAML library doesn’t enable the metadata endpoint by default, we will need to turn it on. We do this by adding it as a filter in the http security configuration. Note, this step is optional if your metadata is stored as a file or is served up by other means.
package example;

import org.springframework.beans.factory.annotation.Autowired;
import org.springframework.context.annotation.Configuration;
import org.springframework.core.convert.converter.Converter;
import org.springframework.security.config.annotation.web.builders.HttpSecurity;
import org.springframework.security.config.annotation.web.configuration.WebSecurityConfigurerAdapter;
import org.springframework.security.saml2.provider.service.metadata.OpenSamlMetadataResolver;
import org.springframework.security.saml2.provider.service.registration.RelyingPartyRegistration;
import org.springframework.security.saml2.provider.service.registration.RelyingPartyRegistrationRepository;
import org.springframework.security.saml2.provider.service.servlet.filter.Saml2WebSsoAuthenticationFilter;
import org.springframework.security.saml2.provider.service.web.DefaultRelyingPartyRegistrationResolver;
import org.springframework.security.saml2.provider.service.web.Saml2MetadataFilter;

import javax.servlet.http.HttpServletRequest;

import static org.springframework.security.config.Customizer.withDefaults;

@Configuration
public class SecurityConfig extends WebSecurityConfigurerAdapter {

    @Autowired
    RelyingPartyRegistrationRepository relyingPartyRegistrationRepository;

    @Override
    protected void configure(HttpSecurity http) throws Exception {

        // This will enable the m
        Converter<HttpServletRequest, RelyingPartyRegistration> relyingPartyRegistrationResolver =
                new DefaultRelyingPartyRegistrationResolver(this.relyingPartyRegistrationRepository);

        Saml2MetadataFilter filter = new Saml2MetadataFilter(
                relyingPartyRegistrationResolver,
                new OpenSamlMetadataResolver());

        http
            .saml2Login(withDefaults())
            .addFilterBefore(filter, Saml2WebSsoAuthenticationFilter.class)
                .antMatcher("/**")
                .authorizeRequests()
                .antMatchers("/**").authenticated();
    }
}
This will then turn on the metadata provider at the url http://localhost:8080/sample-sp/saml2/service-provider-metadata/samlexample This URL is dynamically generated based on the following configuration:
String url = "{baseUrl}/saml2/service-provider-metadata/{registrationId}";
Creating your keys and certificates
Open a terminal window and navigate to your resources folder of your project and run the following:
mkdir credentials
cd credentials
openssl req -newkey rsa:2048 -new -nodes -x509 -days 3650 -keyout private.key -out public.cer
This will generate a PKCS#8 format private-key and public key pair. You will now have a certificate and private key file in your resources folder which is conveniently located on our classpath in Spring Boot by default.
openssl req -newkey rsa:2048 -new -nodes -x509 -days 3650 -keyout private.key -out public.cer
Generating a 2048 bit RSA private key
..................+++
.........................+++
writing new private key to 'service-provider-private.key'
-----
You are about to be asked to enter information that will be incorporated
into your certificate request.
What you are about to enter is what is called a Distinguished Name or a DN.
There are quite a few fields but you can leave some blank
For some fields there will be a default value,
If you enter '.', the field will be left blank.
-----
Country Name (2 letter code) []:US
State or Province Name (full name) []:Florida
Locality Name (eg, city) []:Palm Beach
Organization Name (eg, company) []:Code Tinkering
Organizational Unit Name (eg, section) []:na
Common Name (eg, fully qualified host name) []:codetinkering.com
Email Address []:ignoreme
-----BEGIN CERTIFICATE-----
MIIDojCCAooCCQCmecTaAGS7EDANBgkqhkiG9w0BAQsFADCBkjELMAkGA1UEBhMC
VVMxEDAOBgNVBAgMB0Zsb3JpZGExEzARBgNVBAcMClBhbG0gQmVhY2gxGjAYBgNV
BAoMEWNvZGV0aW5rZXJpbmcuY29tMQswCQYDVQQLDAJuYTEaMBgGA1UEAwwRY29k
ZXRpbmtlcmluZy5jb20xFzAVBgkqhkiG9w0BCQEWCGlnbm9yZW1lMB4XDTIwMTEy
NTE3NDIwOVoXDTMwMTEyMzE3NDIwOVowgZIxCzAJBgNVBAYTAlVTMRAwDgYDVQQI
DAdGbG9yaWRhMRMwEQYDVQQHDApQYWxtIEJlYWNoMRowGAYDVQQKDBFjb2RldGlu
a2VyaW5nLmNvbTELMAkGA1UECwwCbmExGjAYBgNVBAMMEWNvZGV0aW5rZXJpbmcu
Y29tMRcwFQYJKoZIhvcNAQkBFghpZ25vcmVtZTCCASIwDQYJKoZIhvcNAQEBBQAD
ggEPADCCAQoCggEBAL5MxsxjyRlR9EDKMxxg+9SfcLVsZzLTjNMrGkVAlTkSLkaG
dZKUe6W9epwUXhlSR+9DvRuereKXpEUJj4Nj2e6YCANjfjMFYmWqTgZAv5n5bDg/
dhMUH43qxRV7lrWdIvQyfetaQP2jUcrOlbcstna8W9CbcS3vT8QDcm4rS2hf9/Gd
5yoUJhBzyDYl/sqmu2WHRqEC/JzjSdALHZNveta4BWMApYBMp6R2yMaptdNw/eCh
8Dxd8GSIMAolF+0gI3WMjzPsElUGvn0Hb/LU1z95gchfBqYL8Dh9u77x3hOWSSS7
zgExYALhUeParUuePJa1jz4yaKsv8fgWbWAlWssCAwEAATANBgkqhkiG9w0BAQsF
AAOCAQEAp1lCi8gfEeO+qenw55/poJUIAHSeR2Lf0MgmDQJU9CB24nh9/Z5/lDRA
NHGhVDRfL8NtNmouGeZ+gSYSgQyfp4MCKlrIsBl9wi2zoaq4IrlmsTpIsvv2XQ0K
jsGROWvO7cCwjvGI7GRtw0kytTFJunmBQPqrROxc4Z9+rUoanRsZZ/QFjOSihCNi
rmyHW6YwCgFf3zFSjm0cGGu7vojci1nEEqAplU9+49+LoC/kAgAw6IAQpCR9gB6z
jWhsuL87qt+5cMjpBZiMSvhehxJSZyLJ45m+KLulUT61Oyo4ey3Lhg4JMh6PkWz3
0GqLMD1/hCp6ZMTliDQrXtwJbOTPjA==
-----END CERTIFICATE-----
-----BEGIN PRIVATE KEY-----
MIIEvgIBADANBgkqhkiG9w0BAQEFAASCBKgwggSkAgEAAoIBAQC+TMbMY8kZUfRA
yjMcYPvUn3C1bGcy04zTKxpFQJU5Ei5GhnWSlHulvXqcFF4ZUkfvQ70bnq3il6RF
CY+DY9numAgDY34zBWJlqk4GQL+Z+Ww4P3YTFB+N6sUVe5a1nSL0Mn3rWkD9o1HK
zpW3LLZ2vFvQm3Et70/EA3JuK0toX/fxnecqFCYQc8g2Jf7Kprtlh0ahAvyc40nQ
Cx2Tb3rWuAVjAKWATKekdsjGqbXTcP3gofA8XfBkiDAKJRftICN1jI8z7BJVBr59
B2/y1Nc/eYHIXwamC/A4fbu+8d4Tlkkku84BMWAC4VHj2q1LnjyWtY8+MmirL/H4
Fm1gJVrLAgMBAAECggEBAKjnDCutBXhrvRckYGj3y4zUVv0v0gjSq1NiFlcRE2Es
OdZu0Tvgfj6FBqYxjbN7zE0ZGmfBVySe4zZDXhWIMo4KclJPpFs0lDkYB1iVb3oC
X4MtEGeunLMhhPukTge0CKolho219akppBcVdNy32ttYI0XsMXBLz8hyJsaRtsRT
oav3ck6YVPRhOsEqvBhu0xMDlTZ2H/bxhrNu+JqmhisI4h0ELMUdByBvbOjTDgco
wJP1RG1CjmFKviYg3/3Kt5oXIPoSRu9zyLwHSHvwjYT2MasgE57cB2BgAgZxuz2P
3FGddMtJu/QazAqSR7orNgZELXew8ckqBj/jvZgiywECgYEA4AL+IcTEEqlQoJGl
8LHmIh5SgvcdMkEkYMgm2o/ci0rotFa9jCVuQIf3A1zq+BBjNWmYaoLJhwkMSi3q
HI+iawp2feIYr5Apmny4Ae7zxpxkGbXq6M4DPCKWxI8m6xckrxW+3OXz66N6gXw2
BoSG9Ah/WYWMHE61kbdBN6x8axECgYEA2XlpGZ9uIMvpYbnP9HN4sBXHjAaEIR/r
kJnOKxmwS7/+KAESyQn8u9V0ex9QlE/bgbXtxsdiyXWRhK5tubUc36eLZ1QQktIg
GyosRZ3yRoRLkCImGbGojqPCaKKFMaj8fZGIaL27rg2wQhGr9vZ37fU4w30DfQKK
AtZImUEFEBsCgYEAitbwAaf9yn8sXMjI65ynQSBADbHxY5NiY6XKBw7BJ4gfIJ7e
Tj1ozxA2NdxiOauWgaVX9TPoigw+lL9OabNQfD144V6/5Bha4MhKF9CtQLzvgcvx
s6bz9FKP1XXQLkci0m2M5UaU3shtBlIg/fsn1Zpqq+aMx4K1IIJPJp1+Y7ECgYBs
YxVdntcNY3OqsCgTxmU1JXWxtSGvPLBz/iQB2SjDaCnsmDRbnC2pFAacwouvj2lw
aVLbik4S6BShkym+r6R3V5Kj6gLkmfNEdq1f+Qth19etO0fP8Hp4tOdUrQNDL9y/
XIQm58EdS1c4ZoRVbptxLpGe5LSTXmuYZGIEd6JlVwKBgFgK152nBmsJWFDPzQR2
iVKfc/eo2AiDy5WJEJNlxyhRCxVN4oO1fsB6QFnjlYya4IkhJE9qZCME97BVX2YB
Lvkt/CWrGTJtFVpqh+pK9ujp6ln0KrmrF4JJrIOMW7SRn/zyqoM+xVd5buVApyiD
L4/ELSEvYAJ+H6DUvi03S9Tw
-----END PRIVATE KEY-----
Finally, make sure to copy the public key (certificate) of your identity provider (if you have one) and place it in the credentials folder naming it identity-provider-certificate.crt.
Configuring your application YAML
Create an application.yml file in your resources folder with the following details:
server:
  port: 8080
  servlet:
    context-path: /sample-sp

logging:
  level:
    root: DEBUG
    org.springframework.web: INFO
    org.springframework.security: INFO
    org.springframework.security.saml: INFO
    org.opensaml.xmlsec: TRACE

spring:
  security:
    saml2:
      relyingparty:
        registration:
          samlexample:
            signing:
              credentials:
                - private-key-location: "classpath:credentials/private.key"
                  certificate-location: "classpath:credentials/public.cer"
            identityprovider:
              singlesignon:
                sign-request: false
              entity-id: codetinkering.com
              sso-url: http://localhost:8081/sample-idp/saml/idp/select
              metadata-uri: http://localhost:8081/sample-idp/saml/idp/metadata
#              verification.credentials:
#                - certificate-location: "classpath:credentials/identity-provider-certificate.crt"
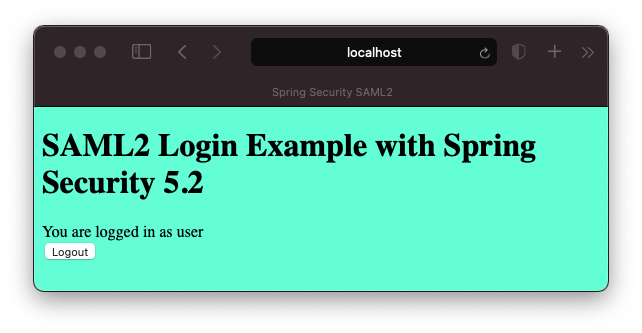
Create an index file within resources/templates called index.html. This file will contain boilerplate code with a link to your identity provider which will be presented to the user so they can log out, along with some sample data:
<!doctype html>
<html xmlns="http://www.w3.org/1999/xhtml" xmlns:th="https://www.thymeleaf.org" xmlns:sec="https://www.thymeleaf.org/thymeleaf-extras-springsecurity5">
<head>
    <title>Spring Security SAML2</title>
</head>
<body style="background-color: aquamarine;">
<h1>SAML2 Login Example with Spring Security 5.2</h1>
<div>You are logged in as <span sec:authentication="name"></span></div>
<div>
    <form th:action="@{/logout}" method="post">
        <input type="submit" value="Logout" />
    </form>
</div>
</body>
</html>
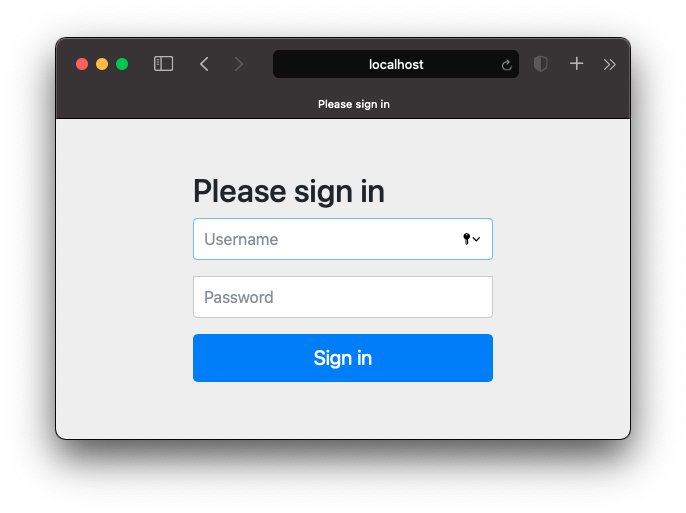
Now run your application and go to http://localhost:8080/sample-sp and you will be automatically redirected to your identity provider (IDP). Note the login screen will vary in appearance depending on which identity provider you are using. In this example I am using the identity provider I created as part of the previous SAML2 tutorial.
Checkout this project from Github
git clone https://github.com/code-tinkering/spring-security-saml2-service-provider-exampleDownload Zip